How To Take Screen Shots In Windows XP/Vista/7
Taking screenshots can be an important thing to do. It might be that you are blogging, trying to show someone something or even there’s an image that you want to save.
Taking screen shots is not an as easy as you think. In XP, Vista and 7, there is not a one click button that takes a screen shot. You then have to somehow save it. So here is a quick tutorial on how to take a screenshot.
In Windows Vista and 7
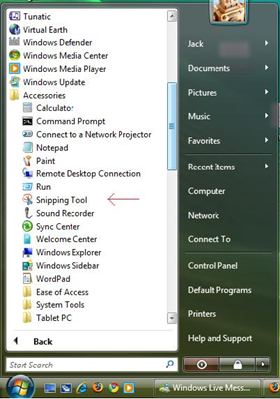
There is a nice nifty program in Windows Vista and Windows 7 that can take screenshots quite easily which is called Snipping Tool. All you have to do is search for Snipping Tool in the Windows Vista start menu. You can find it under All Programs –> Accessories.
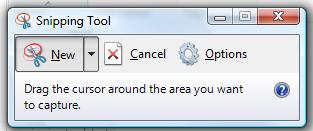
Once you have opened it, you will be presented with a box that looks like this:
First of all, click on the drop down arrow next to New and you can select how you want to take the screen capture. You have a few possibilities such as the entire screen, active window, customised square box, or you can freely draw around the area that you want.
Then click the New button and take a screenshot of what you want.
Once you have taken your screen shot, you can can then draw on or highlight on the image before you can save it. Once you save the image, you have successfully taken your own screen shot.
XP, Vista and 7
The other way you can create screenshots in Vista and in XP is to press the Prt Scr button on your keyboard. This captures everything that is on your screen. If you press the alt key and the Prt Scr key at the same time, you will only capture the active window. (The active window is the window that is currently active)
Then you have to open up Microsoft Paint which can be found in the same location, and the same way as Snipping Tool can be found.
Once in Paint, press the Control key and the letter V to paste the image into Paint. Then you can save the image. Remember to save the image as a JPEG, GIF or PNG for best results and not a BMP since they are very large.
If you only want a certain part of the image, you can follow the below steps:
- Crop the image that you want using the tool that looks like a rectangle.
- Copy the image by pressing control key and ‘c’, open up a new paint document by going to File –> new.
- Paste the image by pressing control key and the letter ‘v’ on the keyboard.
- If there is a lot of white space, you can click on a little blue dot in the bottom right and corner and resize the image. Make sure you first deselect the image before you try to resize the picture area.
Once you are done, you can choose File –> Save and save your image.


The process of taking screenshot of the screen is very easy. You done a great job people who don’t know about it. its a good solution for them.
Thanks, glad you like the content!